Network, Wi-Fi and VPN
Connecting Your Wireless Device
- Access to the Bruin-Secure wireless network requires your George Fox student, faculty or staff username and password.
- The Bruin-Guest wireless network is provided as a courtesy for guests on campus. Individual guests’ mobile devices (phones, tablets and laptops) can get internet access with a passcode sent via text message or email.
Please contact the Service Desk if you still are unable to connect with any of the methods below, or have any questions about the process.
This tutorial will guide you through setting up your iOS device (iPhone/iPod/iPad) on George Fox University’s Bruin-Secure network. (Note: The exact connection process may be slightly different for each version of iOS.)
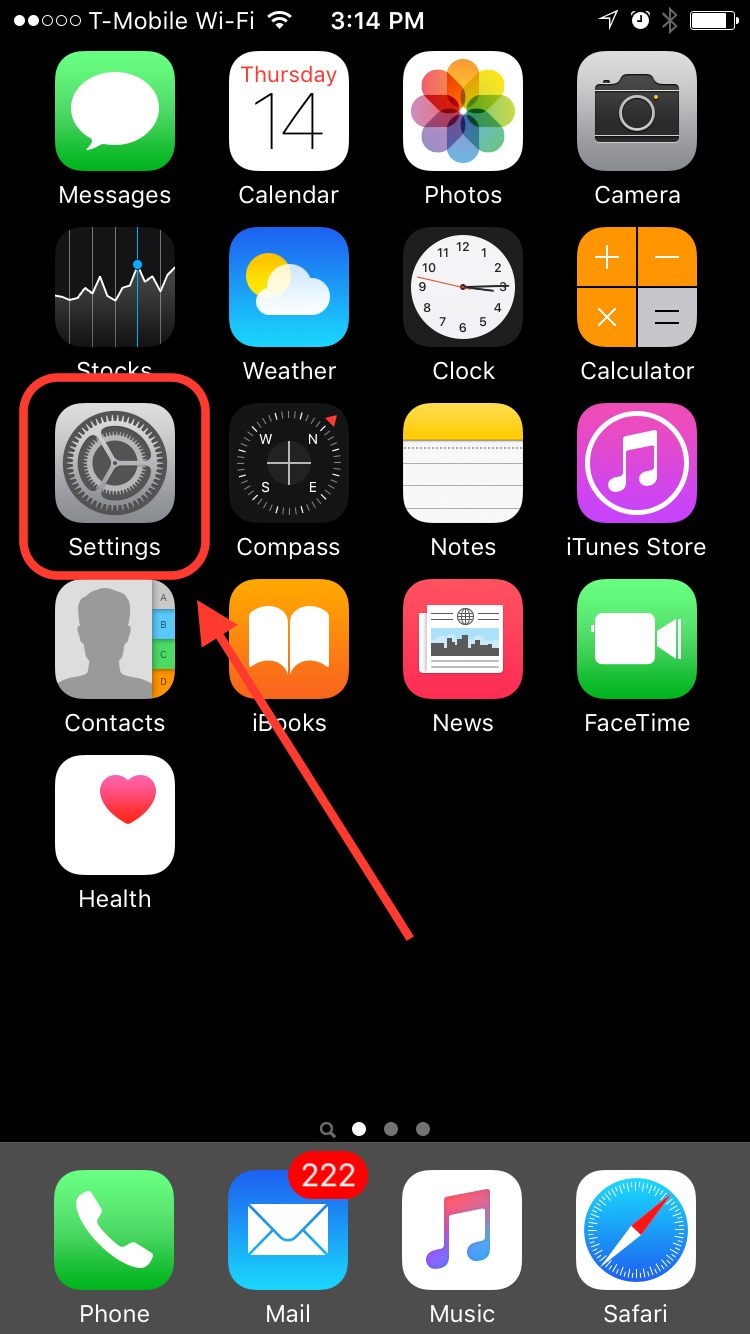
- On your home screen find and tap on the "Settings" icon.
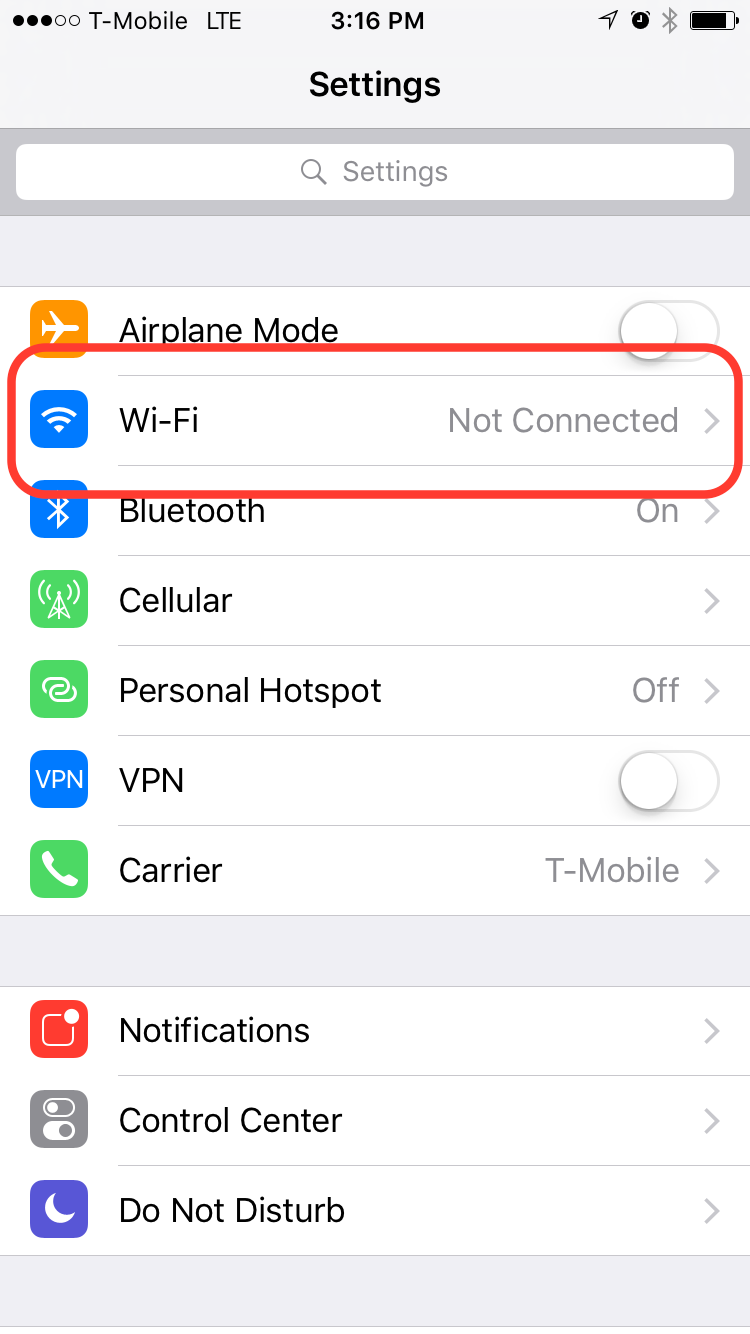
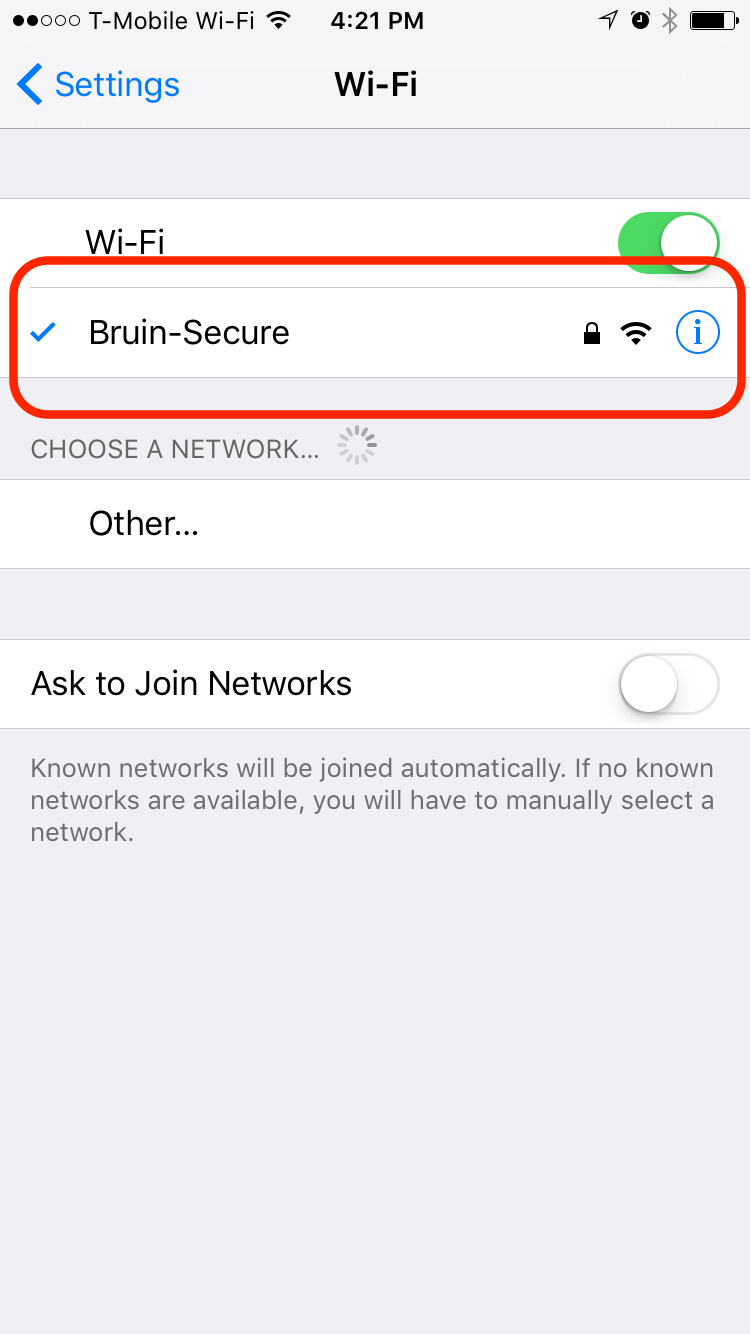
- In the settings menu find and tap on the Wi-Fi tab.
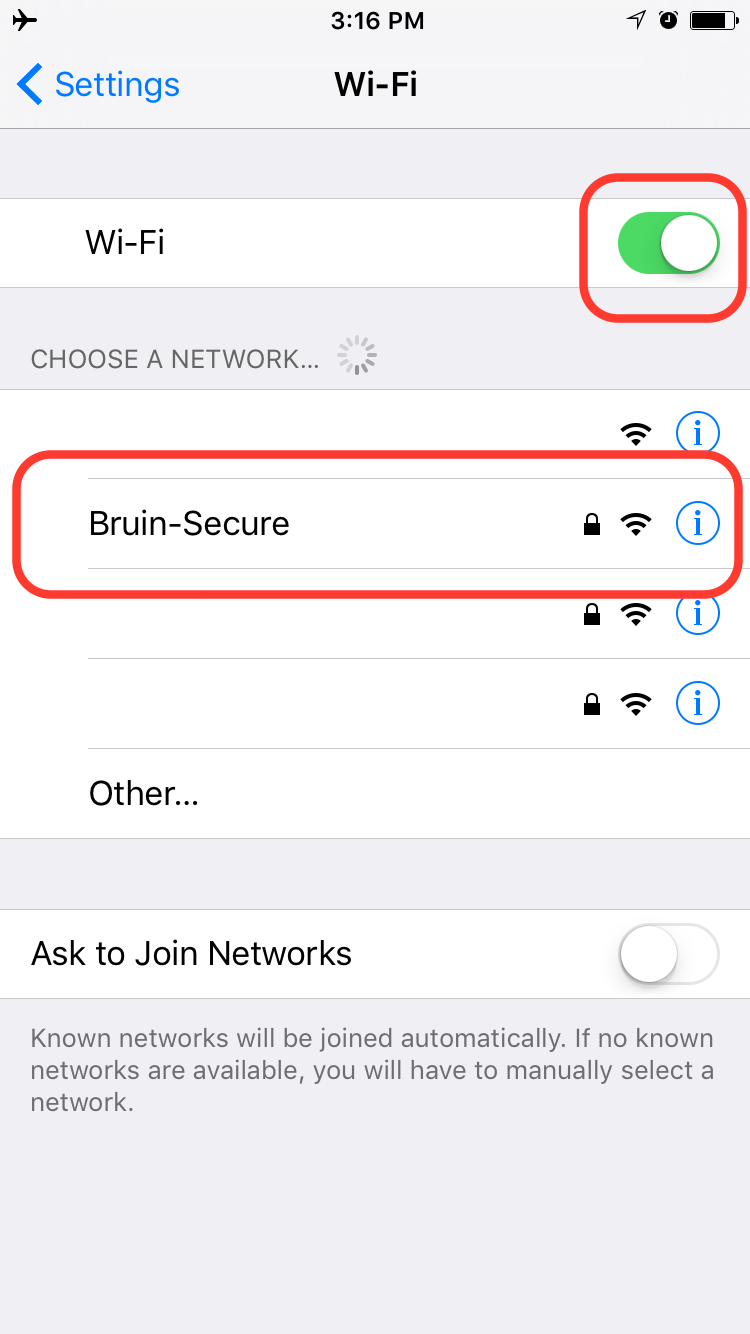
- Turn Wi-Fi on by using the toggle (if not already on) and select the "Bruin-Secure" network.
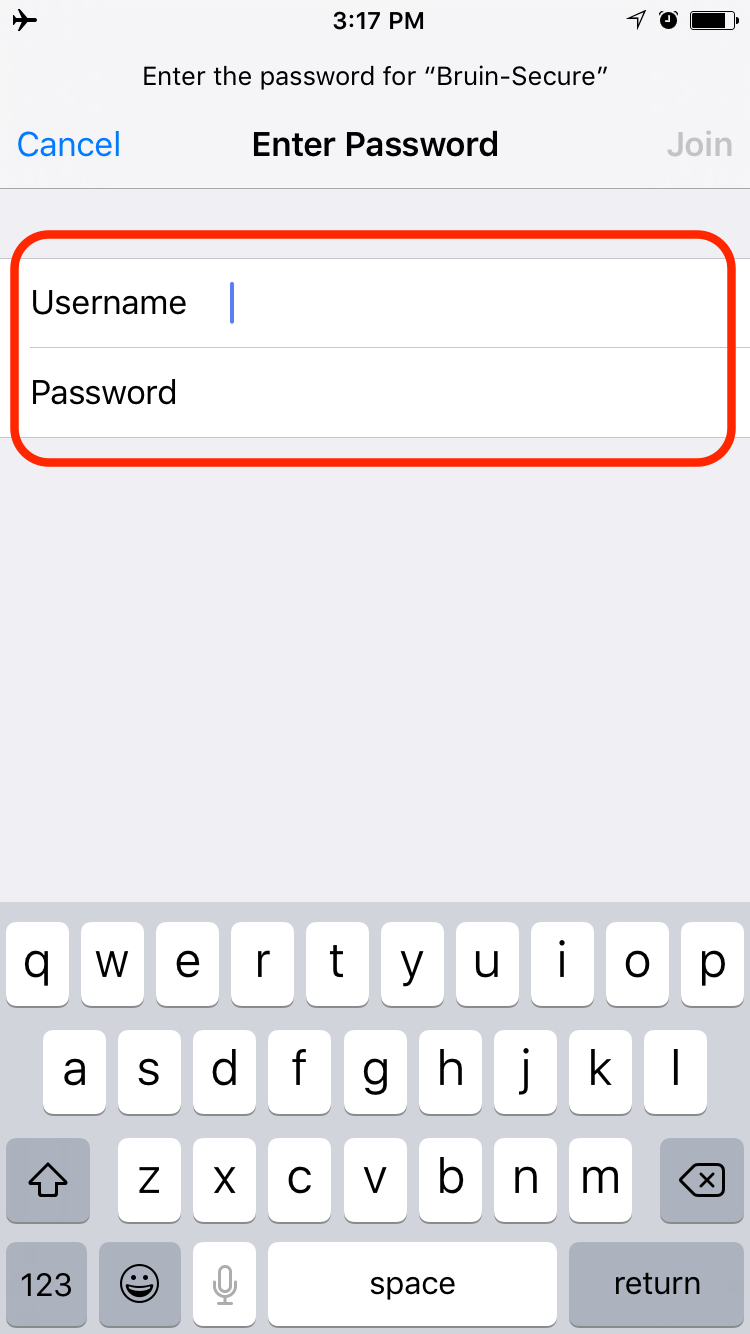
- Enter in your George Fox campus username (i.e. “jsmith15”) and password. Then tap “Join.”
- When the certificate dialog screen comes up tap the "Trust" button.
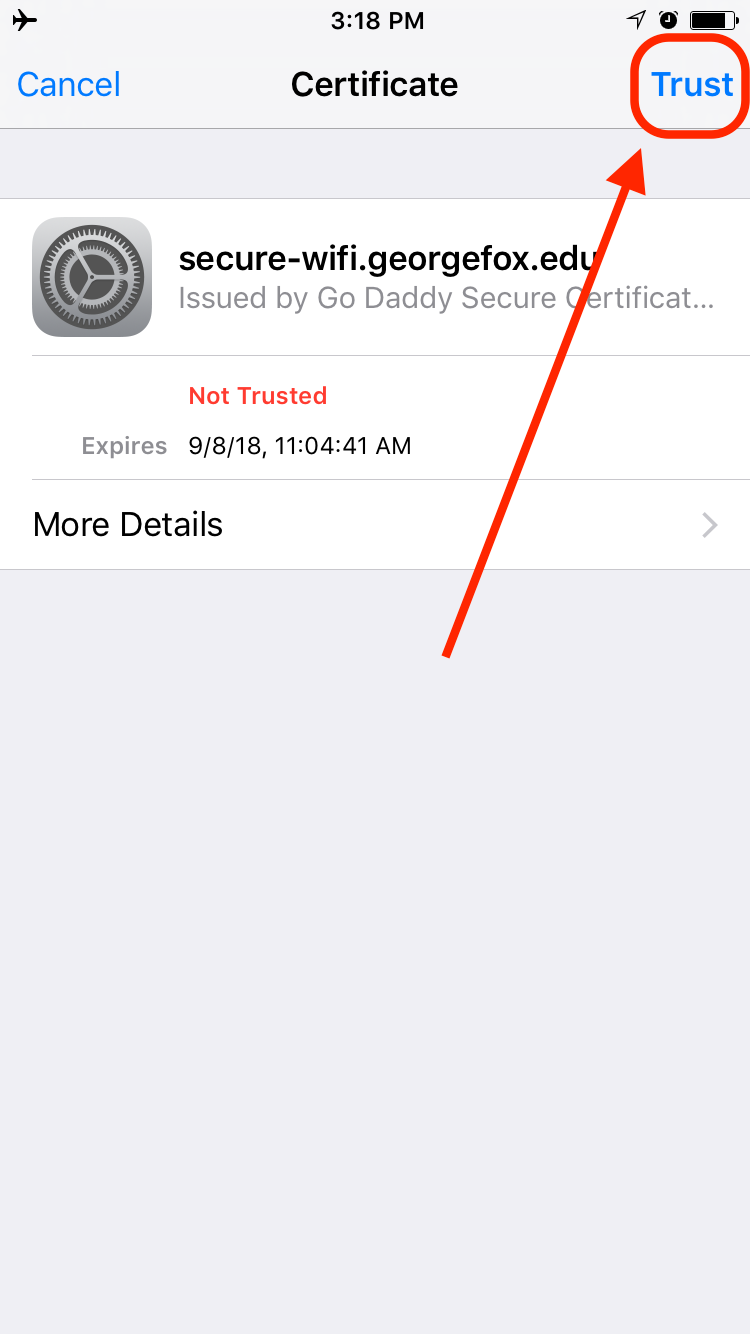
- You should now be connected to the Bruin-Secure network!
This tutorial will guide you through setting up your Android or Chromebook device on George Fox University’s Bruin-Secure network. (Note: The exact connection process may be different for each device. Some components of this guide may not match up exactly to your device.)
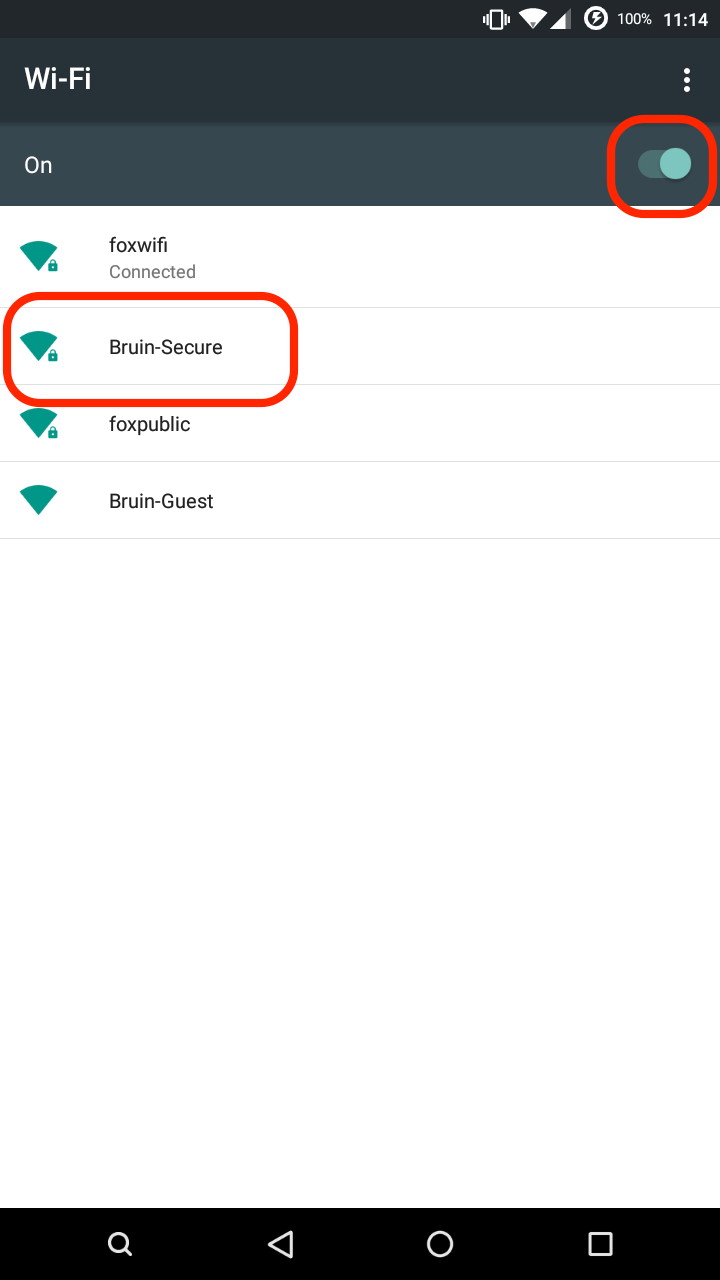
- Swipe down and hold the Wi-Fi toggle button. A page should come up that lists all available Wi-Fi networks.
- Select the Bruin-Secure network.
- Press "Connect to network".
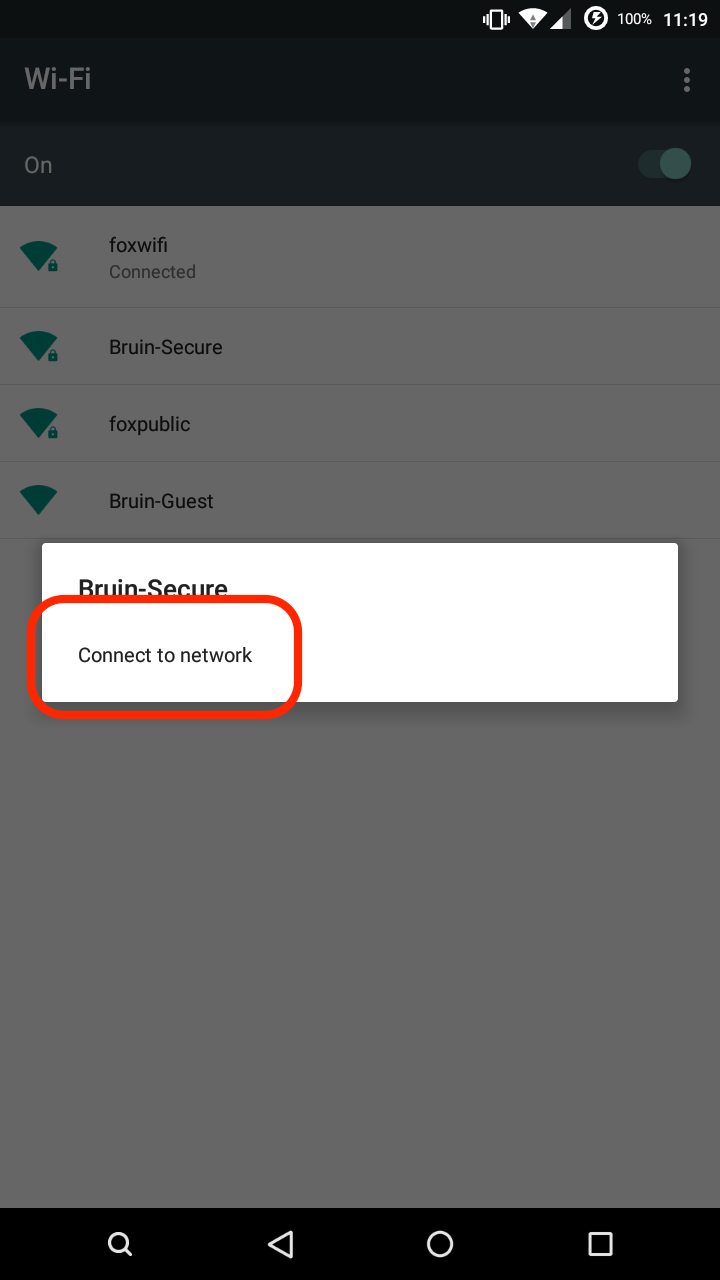
- You will now make some additional configuration changes. Change the following fields:
- EAP method - PEAP
- Phase 2 Authentication - MSCHAPV2
- CA certificate - Use System Certificates
- Online certificate status - Do not validate
- Domain - georgefox.edu
Identity - Your George Fox Email (i.e. "jsmith15@georgefox.edu") - Password - Your George Fox Password
Once those changes are made click “Connect” at the bottom.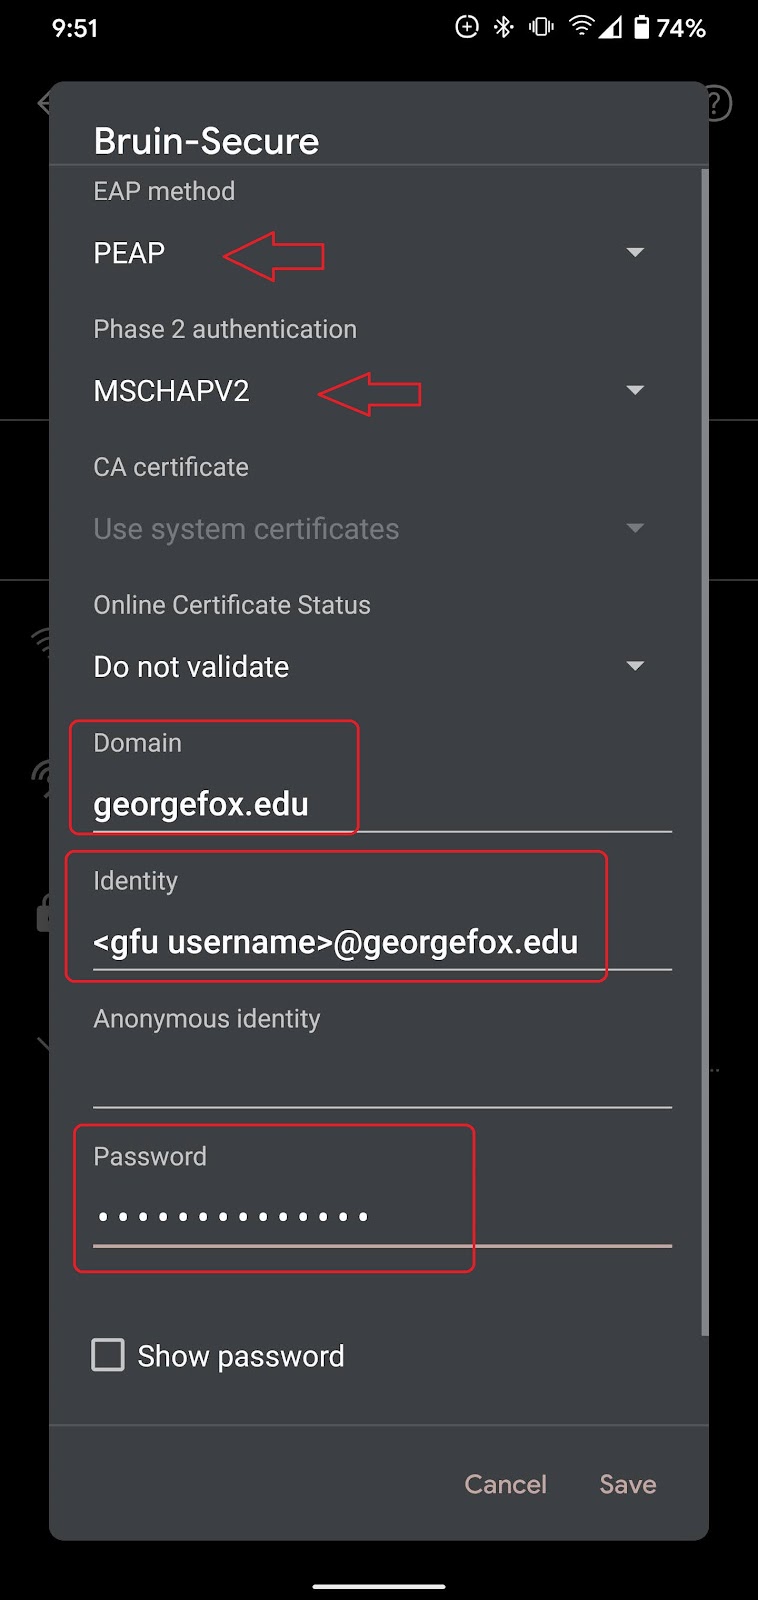
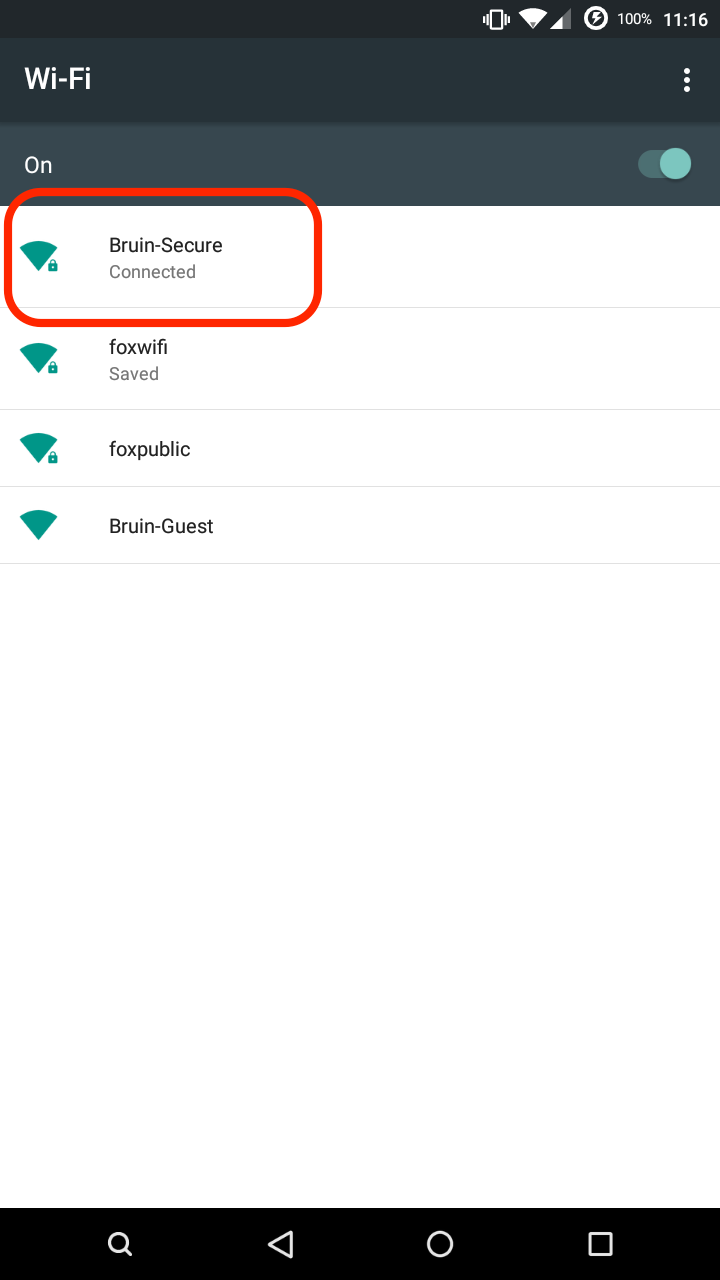
- You should now be connected to the Bruin-Secure Wi-Fi network!
This tutorial will guide you through setting up your Mac on George Fox University’s Bruin-Secure network. (Note: The exact connection process may be slightly different for each version of OS, this guide was made on Ventura (13.3).)
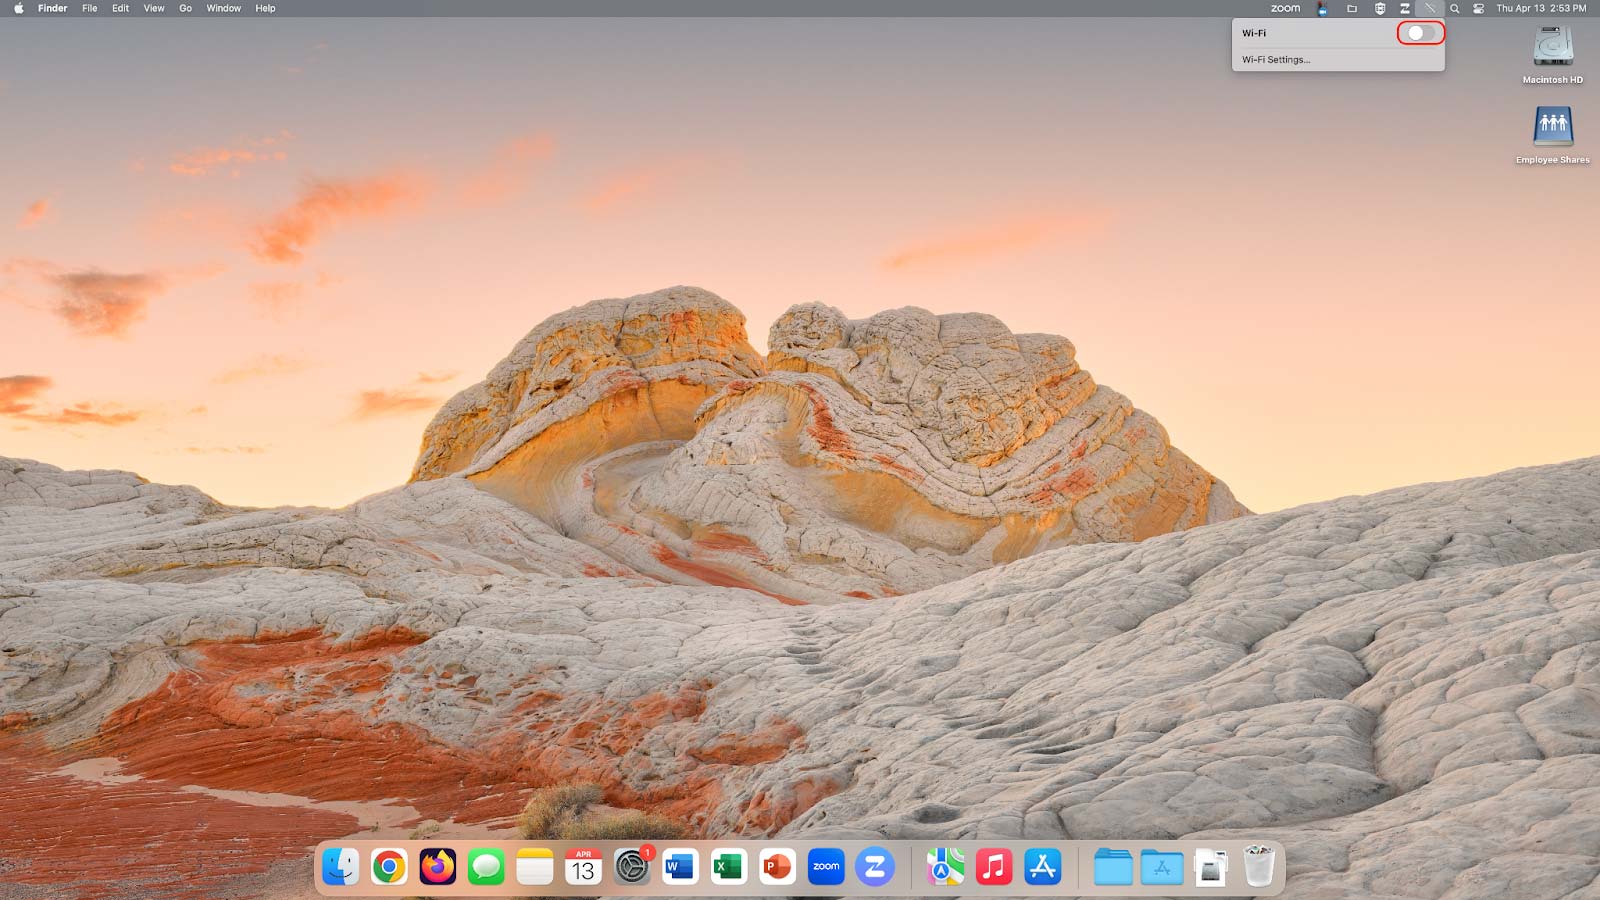
- If Wi-Fi is turned off use the drop-down to select "Turn Wi-FI On."
- Select the "Bruin-Secure" wireless network.

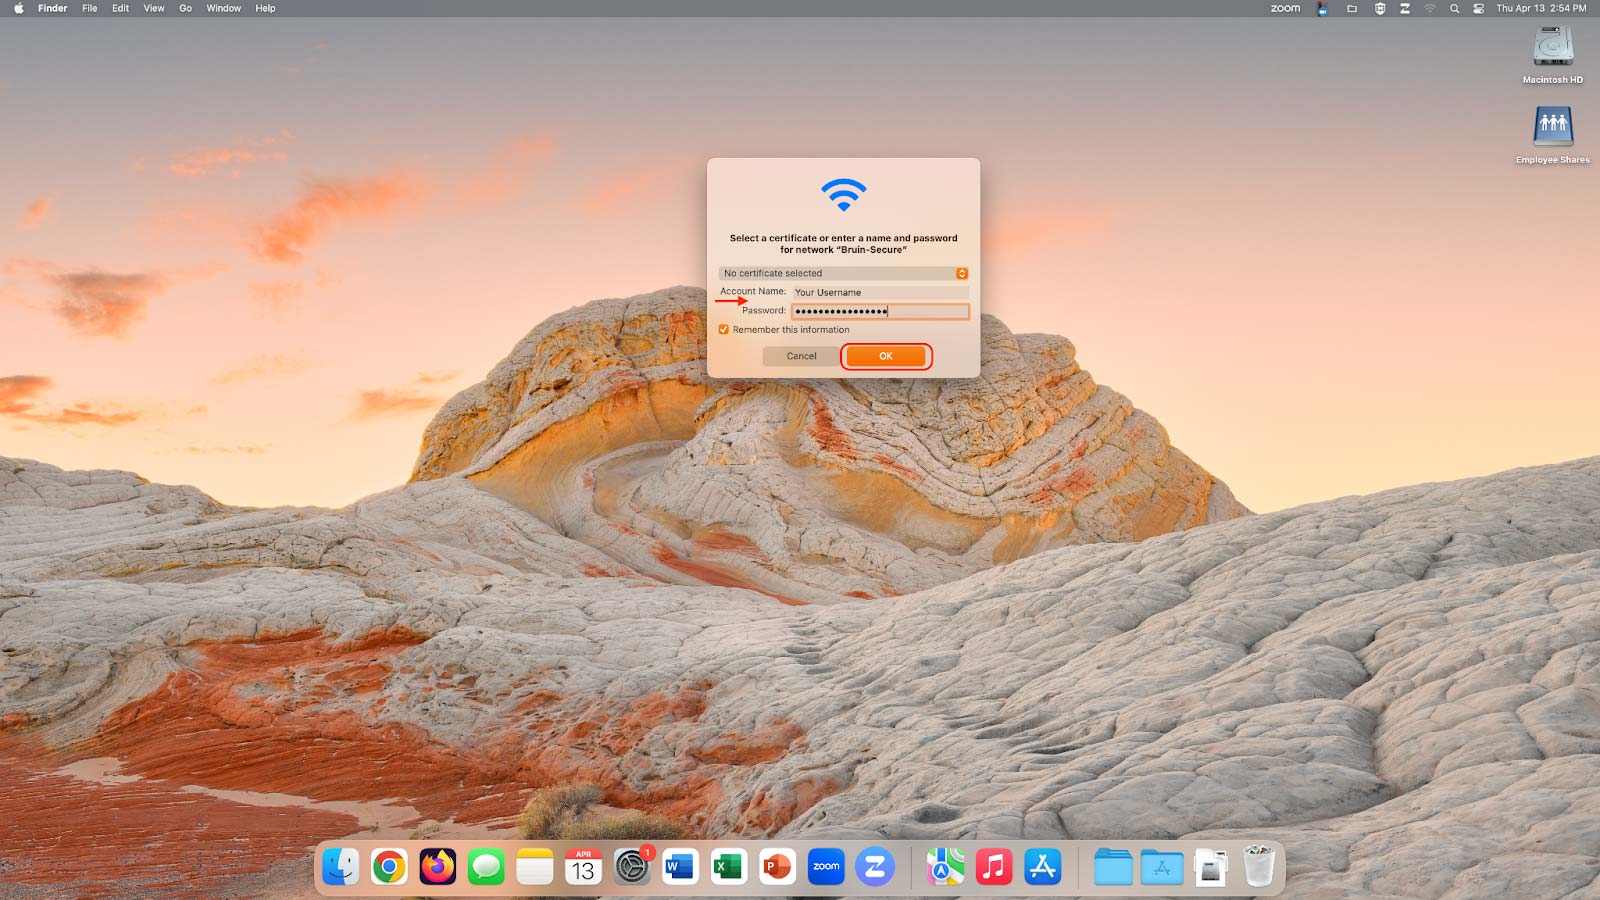
- Enter in your George Fox campus username (i.e. “jsmith15”) and password. Make sure that the "Remember this network" box is checked. Then click “Join.”
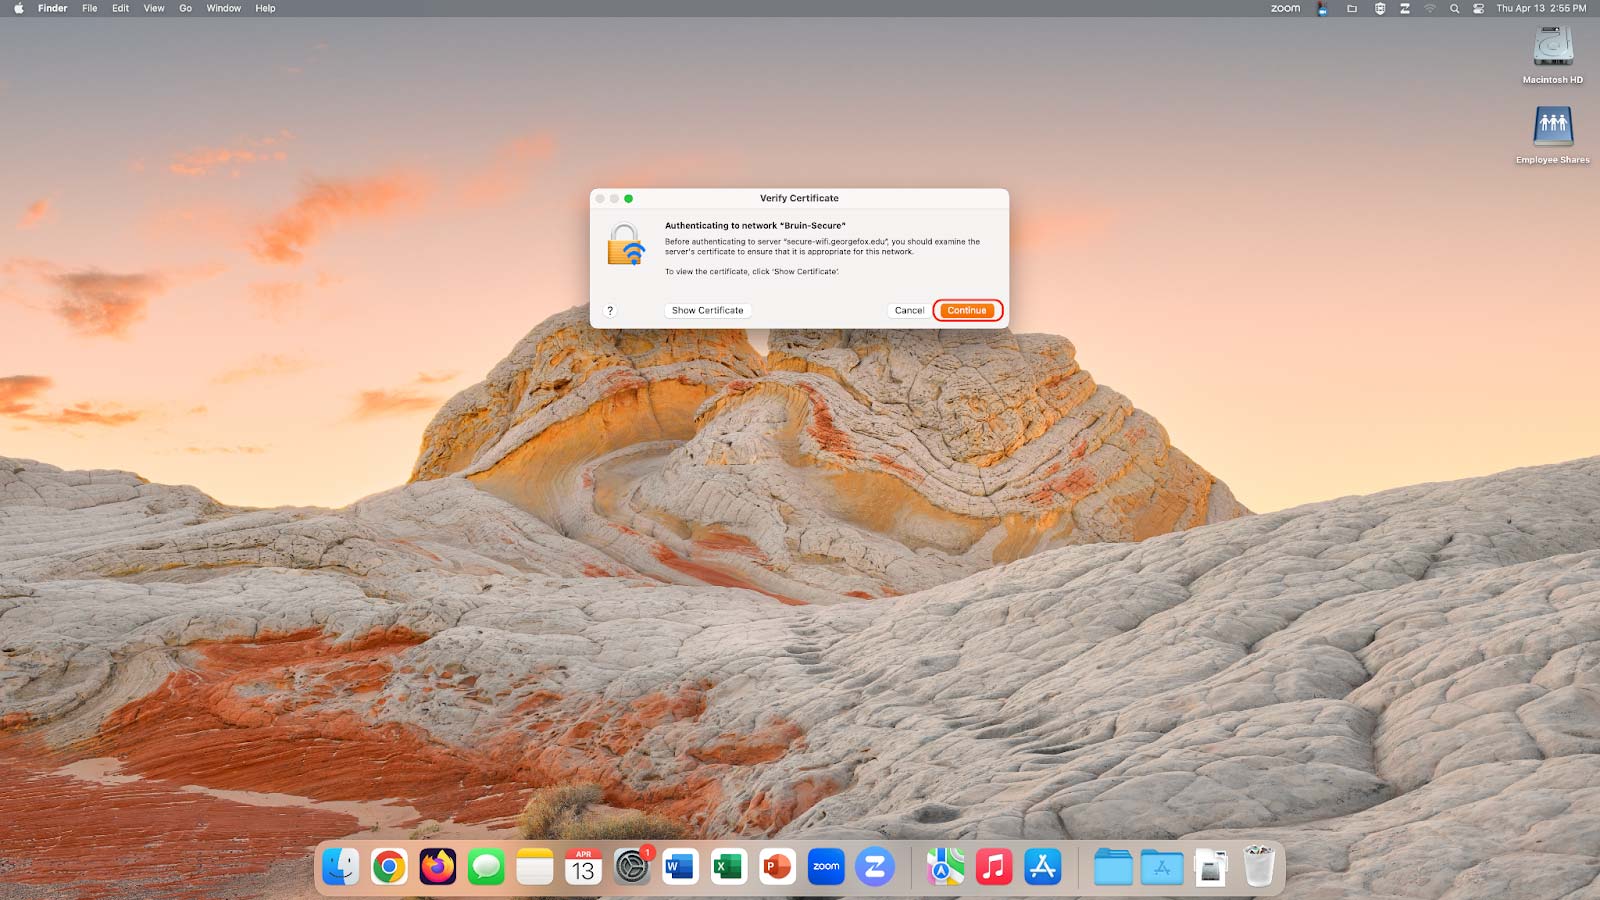
- A "Verify Certificate" box will now pop up. Select "Continue" on this box.
- It will now ask for your computer password to confirm settings. (Note: This password is often the same password that you use to install a new application or unlock your computer.)
After entering your password, click “Update Settings.” You should now be connected to the Bruin-Secure network! Open up your favorite web browser to make sure that you are online and working.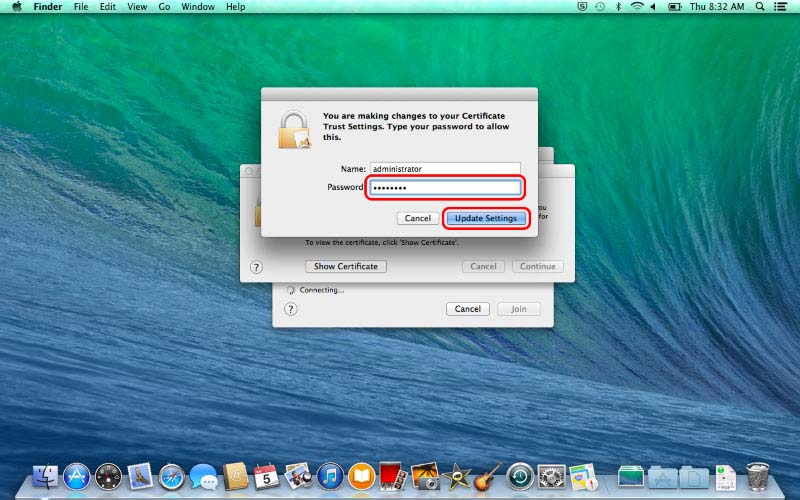
This tutorial will guide you through setting up your Windows computer on George Fox University’s Bruin-Secure network. This process requires the use of a downloaded script which is provided in the instructions. (Note: The exact connection process may be different for each computer. This guide was made for Windows 11, but will also work for Windows 10.)
- Download and run this script.
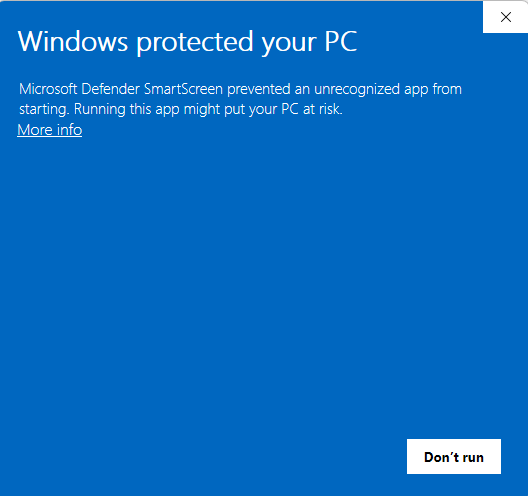
- Windows may block the app. If so, click “More Info.”
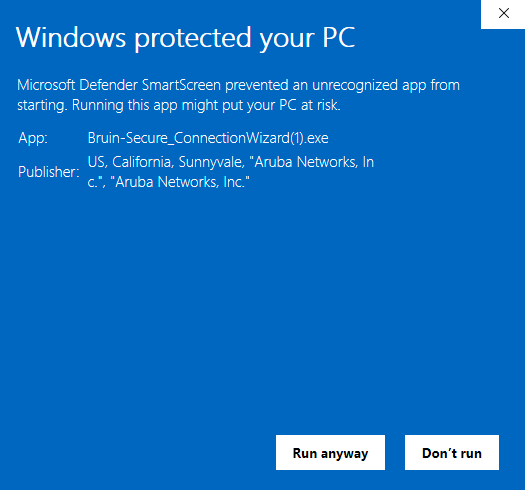
- Click “Run Anyway”
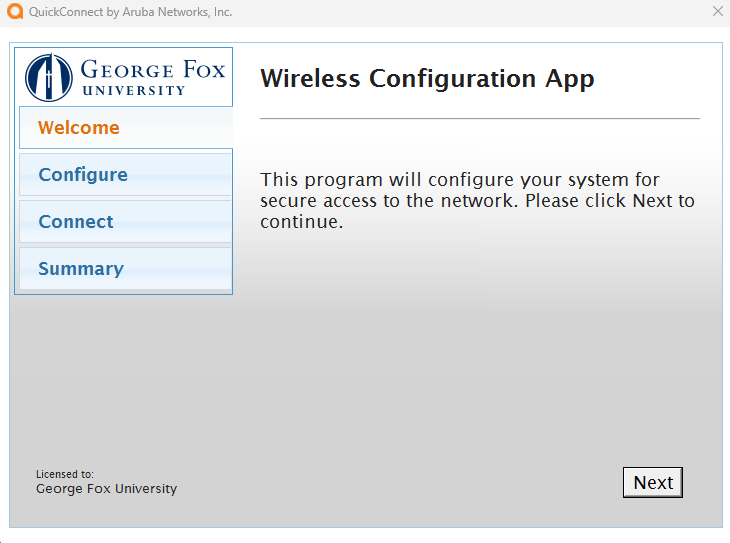
- View the Welcome screen and click the “Next” button.
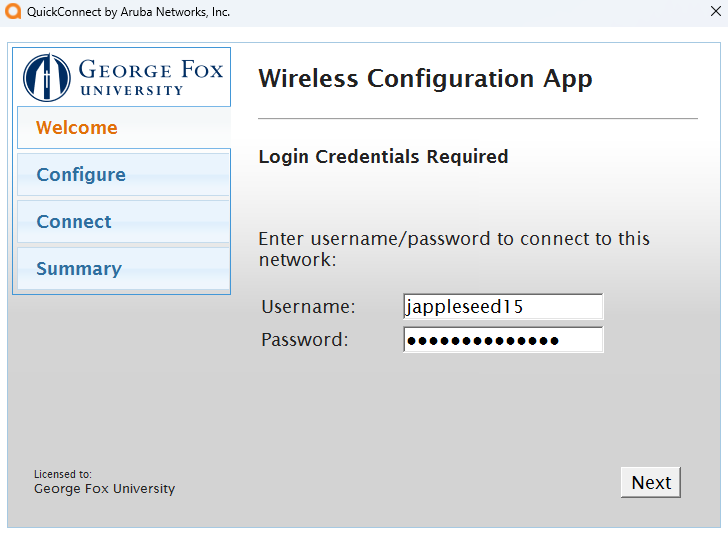
- Enter in your George Fox campus username (i.e. “jappleseed15”) and password. Then click “Next.”
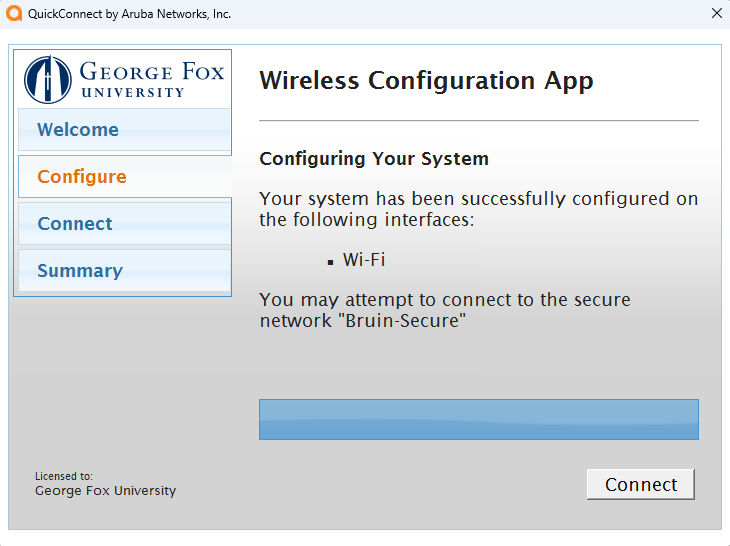
- The Configuration Wizard will proceed to configure your Windows computer to use the Bruin-Secure Wi-Fi network. Click on the “Finish” button and you should now be connected to the Bruin-Secure network! Open up your favorite web browser to make sure that you are online and working.
Students wishing to connect gaming or other entertainment devices to the computer network have two options.
Ethernet
- If your gaming or entertainment device has an ethernet port, use it.
- If the port in your room is not active, contact the ServiceDesk to have it activated. Be sure and provide your building name, room number and data port number in your request.
Wireless
If you want to connect your gaming or entertainment device to the wireless network follow these steps to find the device MAC address and register the device for network access.
- Find your device’s wireless MAC address. A MAC address is the device’s unique identifier. It contains 12 alphanumeric characters (0-9, A-F), similar to 7C-ED-8D-56-65-19. You’ll often find this address on a label on the bottom of the device, or on the box it came in.
On some devices like the Amazon Echo and Google Chromecast, you'll need to power on the device and start the configuration process with the appropriate app before the MAC address is provided. Only proceed far enough to get the MAC address. Once you find it, copy the address down carefully, you'll need it later. - Register your device. Using you laptop or tablet/phone:
- Open a browser and go to secure-wifi.georgefox.edu/guest and login using your George Fox credentials. Note: For some groups and in some browsers, if you have not accepted the secure certificate on this device before, a warning will pop up and indicate that the identity of the server clearpass1.georgefox.edu can not be verified. You can always review the certificate to ensure that it is named secure-wifi.georgefox.edu and issued by Go Daddy Server Certificate Authority before accepting or trusting the certificate. Once the certificate is trusted, you'll be able to access the registration website.
- Click on “Create Device”
- Enter a device name that will make sense to you and those around you (e.g. “Nathan’s Apple TV”).
- Enter the MAC address of your gaming or entertainment device (the one you copied down in an earlier step).
- Check the “Enable AirGroup” if you want others nearby to see and access your device.
- Click the “Create Device” button.
- Finish your setup and test. After a couple minutes, back on your gaming or entertainment device:
- Connect to the Bruin-Guest wireless network.
- Test to verify that you have internet access.
- After completing these steps, you should have a working network connection on your gaming or entertainment device. A few devices may require a reboot to connect successfully at this point, and some devices may not work until 24 hours have passed.
VPN
An encrypted and authenticated VPN connection is available to staff and faculty who need to connect to university resources. A Virtual Private Network (VPN) creates connections to resources at both the Newberg campus and the Portland Center. This will allow broadband connections to act as if the computer is on campus, enabling you to access files on your work computer or other networked resources.
Students needing VPN can have their supervisor or instructor email servicedesk@georgefox.edu to request access.
Multi-Factor Authentication Requirements
You will be required to use the OKTA Verify app with push notifications set up as one of your MFA options to access VPN. Like other Single Sign On apps, the VPN system will send a push notification to your OKTA Verify app. More information about setting up Multi-Factor Authentication.
The FortiClient VPN set-up will be transparent and not require any changes on your side. The Windows and Mac clients should look similar to this and you should not need to adjust anything.
Installation
The software can be installed on recent versions of Windows, OSX, iOS, and Android operating systems. Review our documentation for information on installing the software.